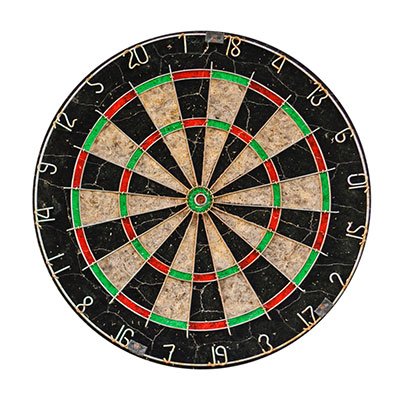
Whether you're going on a vacation or you're a darts enthusiast that spends a lot of time playing, you'll need a backboard. A delicately designed backboard is an eye-candy, but it also serves a much larger purpose.
Having a quality dartboard backboard not only protects your wall or the surface you decide to hang it on, but it also helps preserve your darts, especially if they are soft-tip. However, darts equipment can be quite expensive, but that's no reason to start panicking.
Below, we'll offer you detailed instructions on how to manufacture a DIY dartboard backboard, and once you read it, you'll see that there's nothing to worry about.
Even if you're not a handyman or merely not gifted enough to work with wood, this article will make you feel like a true craftsman.
Stay tuned and learn all about it!
More...
What Should You Know Before the Project?

First off, you shouldn't set your expectations too high.
As this is probably the first time you're venturing with a project like this one, there are bound to be some mistakes from which you'll learn, so you shouldn't let that demotivate you. After all, the process of creating this backboard is simple enough, and the overall result should be positive!
Secondly, try not to spend a lot of money.
Since you're designing your backboard, costs should be minimal because if you go over the budget, you might as well buy a designer backboard and be done with it. This article aims to teach and help you create a tool for honing your gaming skills.
And lastly, here's a list of the items you'll need to get in your local store to design the backboard. You can find them in any larger retail store, and there's no need to go to the hardware stores, as these are everyday items.
Necessary Items
Step by Step Guide on Designing the Dartboard Backboard
In essence, there are two standard ways of creating a backboard - you can use insulation as your salient material or wood if you're feeling up to it.
When it comes to woodworking, that requires a lot of stuff, tools, and skills, so we won't cover that process as this article is targeted for beginners.
On the other hand, this process is quite comfortable and familiar.
As a matter of fact, you've probably seen guides like this online, but we'll offer you our version and insight into this process.
Step 1
As we said, the salient component of this dartboard backboard is the insulation.
It should have at least one-inch thickness as most darts have tips that are just a bit below one inch in length.
So, when you throw a dart and miss the board, it will stick entirely to the insulation and prevent damage to your wall.
When it comes to size, of course, it should be larger than the dartboard, but it's up to you and your preferences.
In general, anything more substantial than 3x5 feet will do the trick.
The first thing you'll need to do is put the dartboard into the upper center of the insulation and use the marker to draw a line around it. Then use the scissors or a knife to cut a hole for the dartboard.
Once you finish, you can sand the whole ring with regular sandpaper to give the shaft a subtle finish and look at it.
Step 2
The next step is providing the cover for the backboard.
From experience, the best material to use is the black felt. Due to its protective characteristics, felt is the most common material for arts and crafts and will serve you well in this endeavor.
Don't worry if you use too much of it because you'll cut the excess and still maintain that gorgeous look. To avoid any wrinkles, you should choose one side from which you'll first apply the felt and put the glue onto the insulation.
Any glue will do, but we strongly recommend the Aleene's Felt and Foam Tacky Glue due to its durable adhesive power. It dries relatively fast and provides a strong bond between the insulation and the felt fabric.
Step 3

Put the felt over the side and slowly apply the glue in the same vertical manner as you did for the first aid.
This part takes a while, but you should be as detailed as possible and shouldn't rush it, as this is the crucial part.
Also, try not to apply glue directly along the edges as the glue can smear them, and you'll probably need to cut some excess fabric towards the end. Once you're done, let it dry for an hour and move on.
You can use wood clamps to secure it, but if you're doing this project in a room with an average room temperature and no airflow, you won't need them.
Moreover, darts tend to fly frequently directly underneath the dartboard, so you might want to consider adding an extra layer of felt just to make sure your primary coating doesn't wear out too much in time.
Step 4
Use standard scissors to cut off the excess felt from the corners and the sides and then apply the glue.
You can use a dull object or a tool for the edges to make sure the felt does not wrinkle.
Step 5
Next, you'll have to cut around the hole where the dartboard goes.
If you're scared of cutting too much, the best way to do it is to cut the circle in a pie-manner. What you'll do is divide the circle into two parts using the scissors, then create quarters, and then eights.
Push the flaps through the gap and glue them to the backside of the backboard so as to not risk cutting too much and ruining all the hard work. That side will go up against the wall and won't be noticeable.
Just make sure to stretch them enough as you can to avoid any inconsistencies on the surface.
Step 6
After you've given the backboard some time to fully dry, the next part is final. Hang it upon on a nail up against the wall and put the dartboard in.
If you've done and mastered all the steps correctly and made sure not to sand too much of the inner hole, the board should fit perfectly like a glove.
Step 7 - Testing Phase

As we've said, the insulation should be one inch thick and shouldn't pose any problems with bounce-outs or stranded darts. To make sure, throw one directly onto the backboard and then remove it from the wall to see if there's any damage.
If, however, there is some noticeable damage to the wall, you can find a wooden plate and cut it with a saw to match your backboard's dimensions. Paint it black and try not to find one that's too thick. Hang it up behind your masterpiece, and you'll solve your problems.
Overall, this project shouldn't cost you more than 30 dollars on average, depending on the type of fabric and glue you'll buy. Most custom-made backboards will cost significantly more, so you'll save money and create something of your own.
The bonus side is that you can also personalize it with different colors, textures, and additions.
You can always experiment and use different fabrics, but matte black felt is still the right choice because the marks won't be as visible, and you'll appreciate the texture.
Step 8 - Optional
Moreover, you can add a cuboid-shaped board at the bottom, paint it black, and drill holes for the darts. It's always an excellent addition, and it's not that hard to install.
Cut it according to the width dimensions of your backboard, drill, or hammer at least three nails into it - two on the sides and one in the middle - and drill six one-inch holes from the upper side so your darts can rest.
In the end, use a black matte color, so it matches the style of your board, and you're good to go!
Final Thoughts - Conclusion
After following all these steps, you'll successfully create your unique DIY dartboard backboard with a personal imprint on it. As you can see, it's not that hard and takes a couple of hours to build.
What's most important is that it'll be yours and something you can look at and use, while feeling accomplished simultaneously.
Share this recipe with friends and try to add some innovations to perfect it. When you feel like you've progressed, the next step will be building a dartboard backboard for handymen!
Until then, enjoy your backboard, master the darts game, and have fun with your neighbors, friends, and family!
